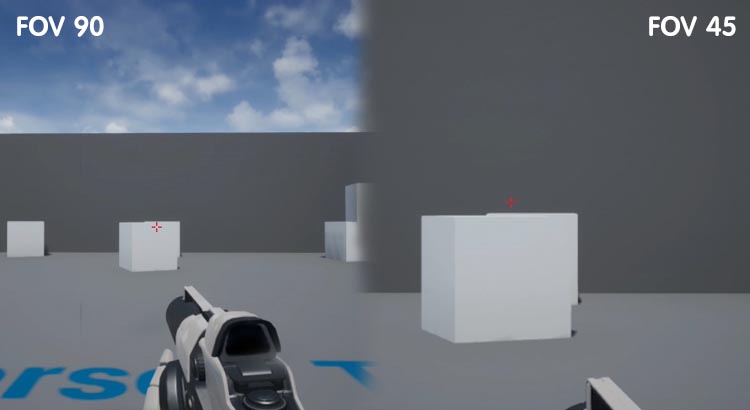
In FPS (First-Person-Shooter) games, we can see that one of the abilities that players have is to use a scope to zoom to aim at the target to shoot. In this project, we're going to add this capability to the Player Character of the FPS template by improving the FOV (field of view) value in the Player Character's FirstPersonCamera component, which has the default 90 degrees, to a lower value. will narrow the field of view of the camera Makes the image on the screen enlarged like a zoom.
โพสต์นี้ยาว มีหัวข้ออะไรบ้าง
Create a project
Initially, create a project by selecting Template as type First Person and setting it as Blueprint.
Define an input button to zoom.
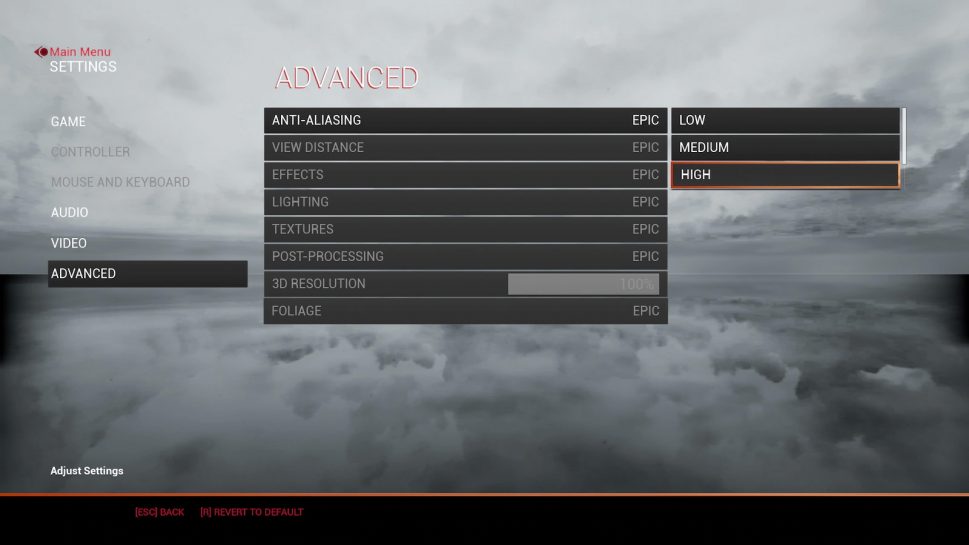
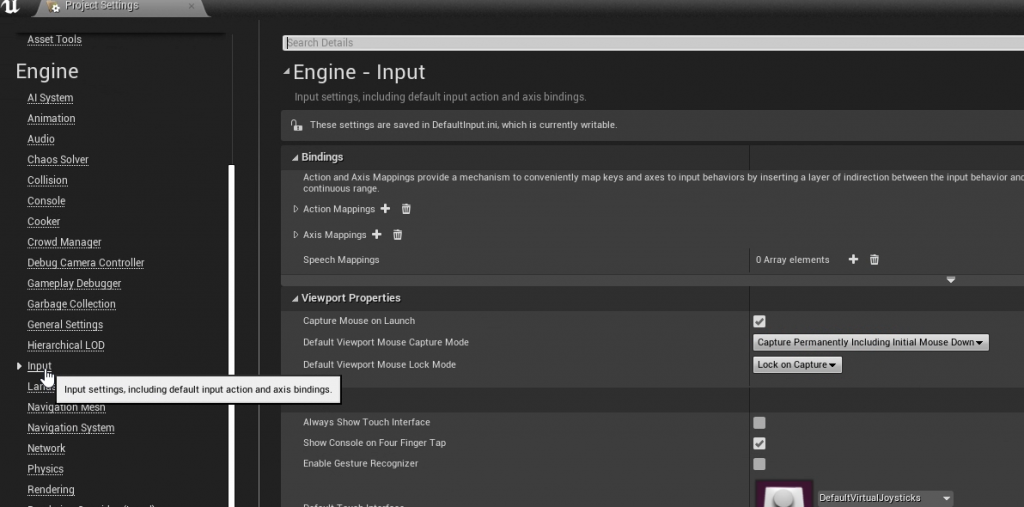
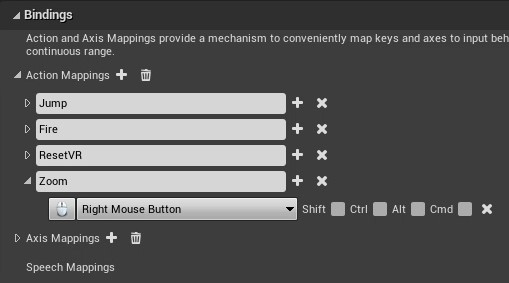
Open the Edit menu from the top menu of the program window and select Project Setting. A window will appear.

On the left-hand side of the window is a list of settings. Go to the Engine category and select Input. Details will appear on the right-hand side.
In the Blinding category, click the (+) sign after Action Mapping to create a new Action Mapping.

Name it Zoom, and then set the button for launching this action to Right Mouse Button.
Script to create Zoom
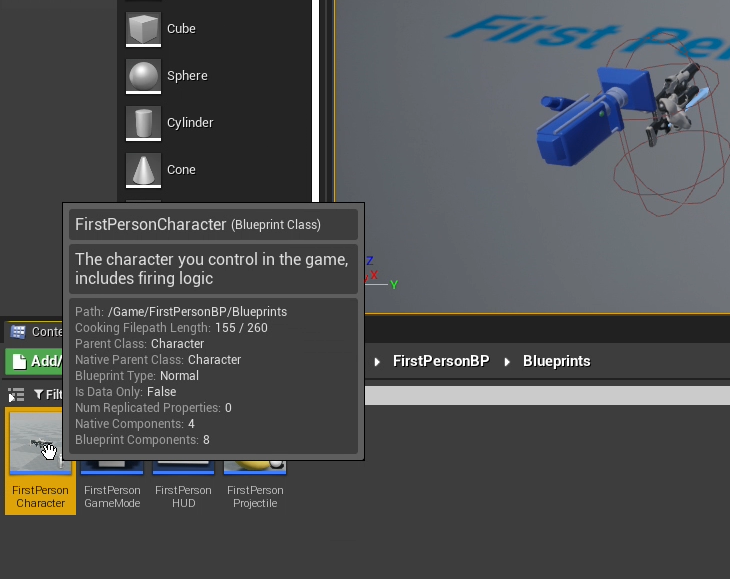
In the main program window, go to the Content Browser tab, go into the Content > FirstPersonBP > Blueprints folder, and open the Blueprint named FirstPersonCharacter.
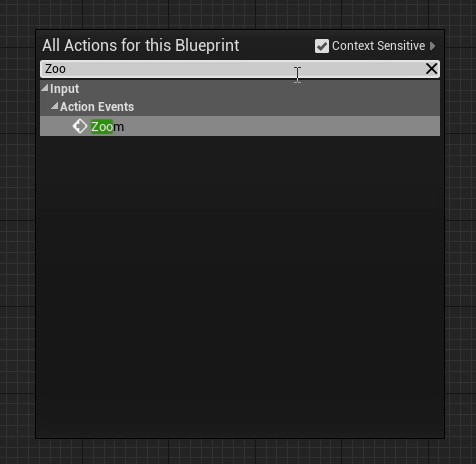
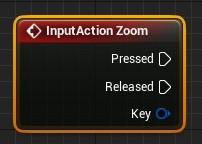
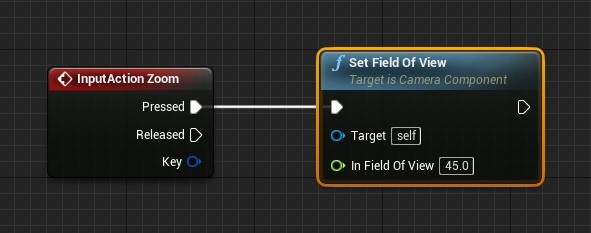
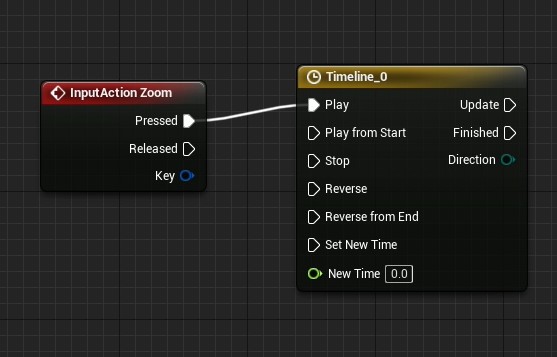
Add an InputAction Zoom node by right-clicking on an empty area and searching for Zoom. This node listens for Input from a right mouse click.
Add a Set Field Of View node by right-clicking on an empty area and searching for Set Field Of View, then set the Field Of View value to 45. This node is responsible for changing the FOV, which is the view of the camera. (FirstPersonCamera) as we set. The program's default value is 90 degrees.
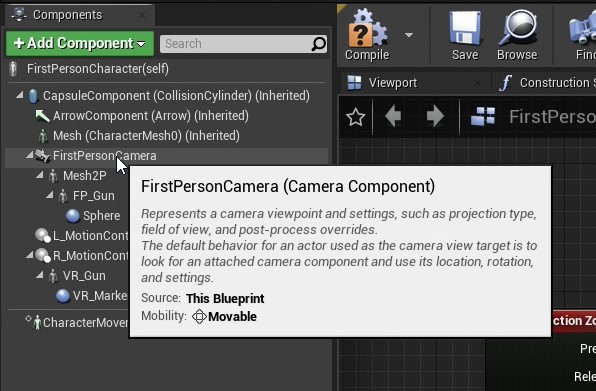
Go to the Component tab, click on FirstPersonCamera. Then drag and drop it on the graph to bring up the First Person Camera node. This node acts as a target for changing the Player Character's FOV value.
Then connect the nodes together as shown
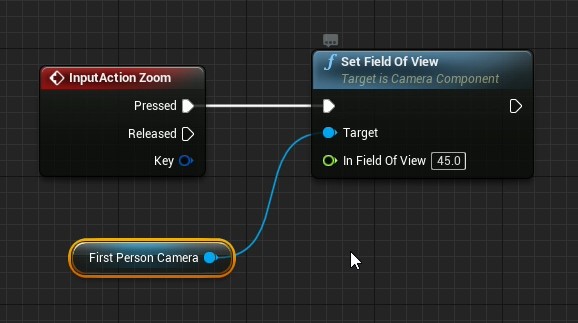
The action of this sequence starts when the player clicks the right mouse button. This is a button to create an Input that sends a signal to the InputAction Zoom node. If the state is pressed (Pressed), the FOV will be set to 45 degrees (default is 90 degrees).
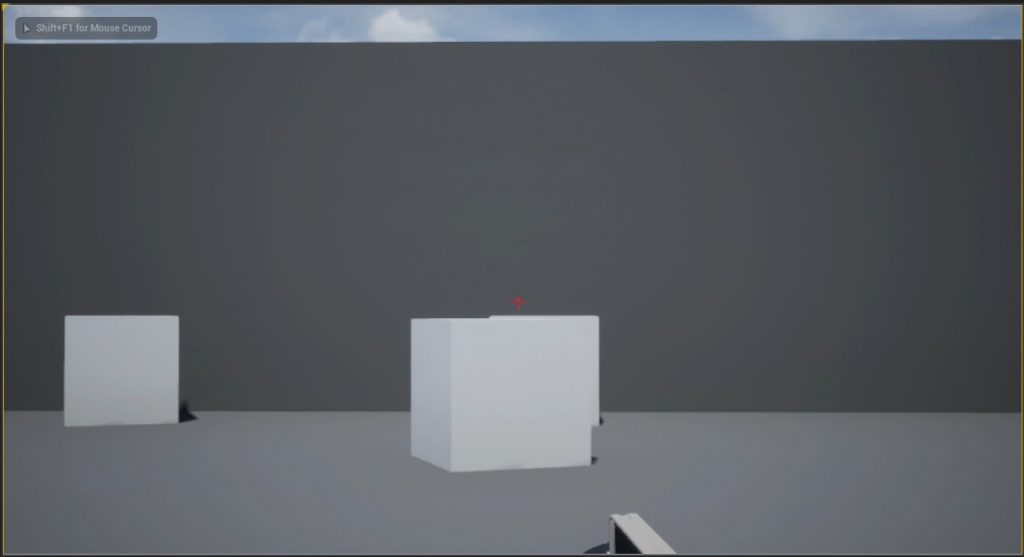
Run a test project When you right-click, you can see that the view of the image will immediately switch to a close-up view.

Improved the script for smooth zooming.
On test runs, the resulting zoom image is like a far to near intersection, as the FOV instantly changes from 90 degrees to 45 degrees. So to solve this problem, we will create an animation showing the change in perspective by making the FOV value change gradually.
Go back and open the Blueprint called FirstPersonCharacter and add a node called Add Timeline. This node will allow us to change the FOV value from one value to another within a specified time period.
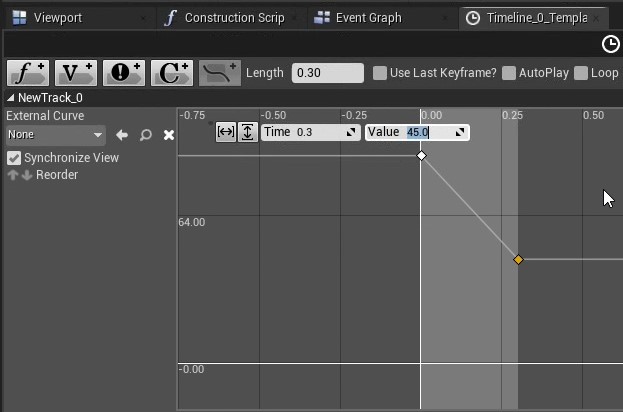
To change the values within the Timeline_0 node, double-click on the node. The Timeline Editor tab will appear, then click on the f+ button at the top left of the tab.
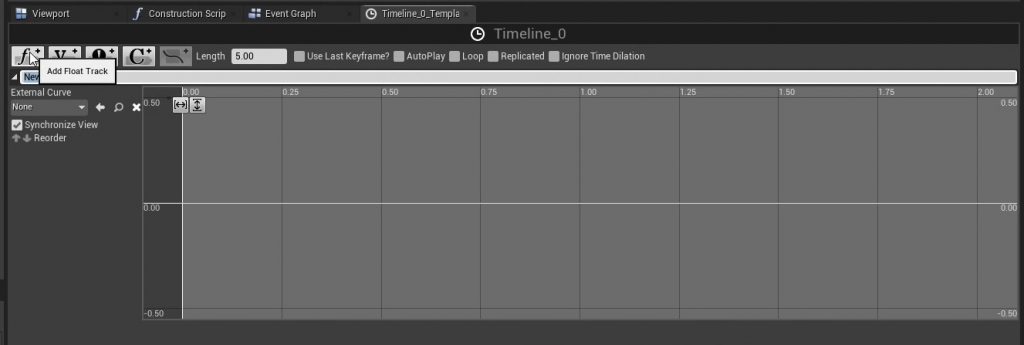
Set animation start time and FOV values by holding down the Shift key on your keyboard. Then click the left mouse near the 0,0 pips on the graph. Time and Value fields will appear on the top left of the graph.
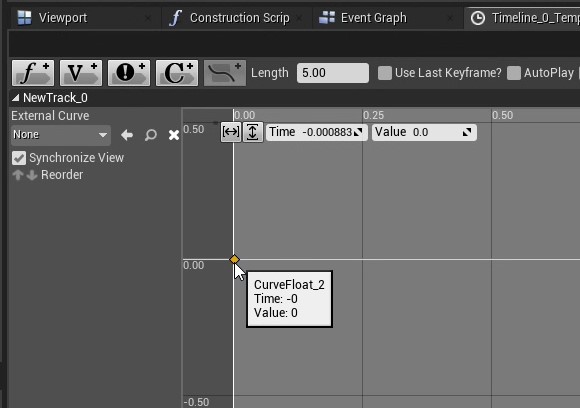
Change the Time value to 0.0 and the Value to 90 (which is the default FOV).
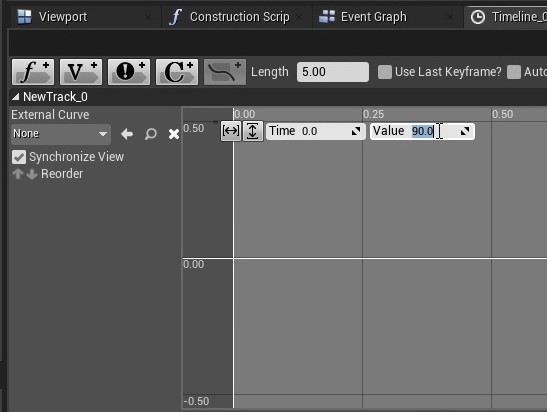
To set the animation duration, go to the Length field at the top of the graph and change the value to 0.3.

Set the animation end time and FOV by holding down the Shift key on your keyboard. Then left-click on the gray area on the graph. Time and Value fields will appear. Set Time to 0.3 and Value to 45.
Then go back to the Event Graph tab, connect the nodes. together as in the picture, then Compile and Save
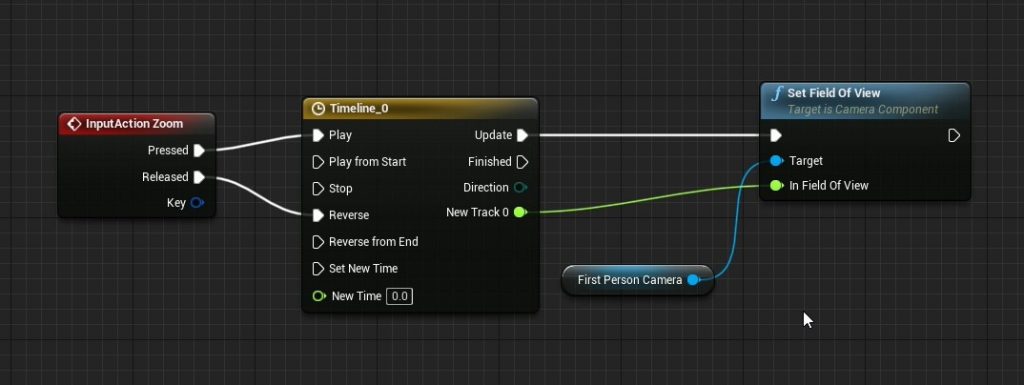
The action of this command starts when the player clicks the right mouse button (Right Mouse Button), which is a button for creating Input that will send a signal to the InputAction Zoom node. If the status is a right mouse click (Pressed), the Zoom animation will be displayed. Forward (FOV is from 90 to 45), but if the status is released (Released), a reverse zoom animation is shown (FOV is from 45 to 90).
After that, run the test. It can be seen that the images produced by Zoom are smoother.